Hi Creative Friends,
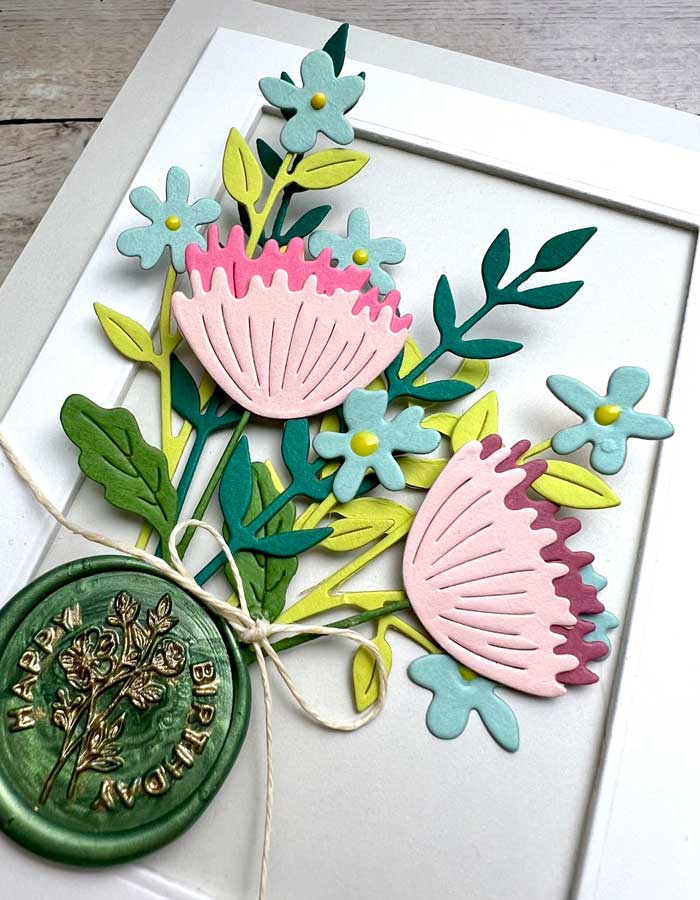
I am popping in to share a few wonderful dies and wax seals to give your card designs a special accent and pizazz! I used the beautiful Sealed Wildflowers die set by Spellbinders, along with one of their charming wax Happy Birthday seal. I think these together proved to be a winning combination, see what you think.
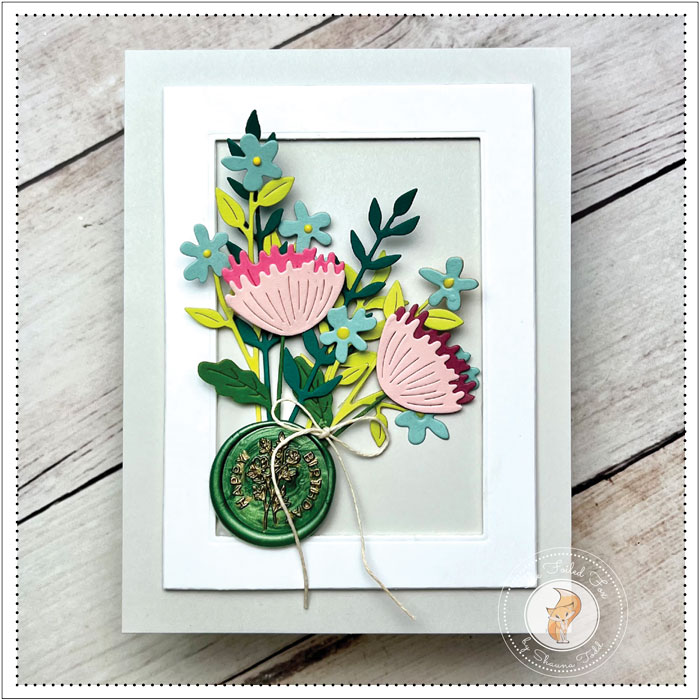
I started with an A2 white card base and added an Antique Gray card panel to the top. Next, I cut a wide white cardstock frame using two dies from the Hero Arts Infinity Rectangles die set. This is an awesome set. You can do soooo much with it… including making any width frame you would like!
Once the frame was made, I added foam strips to the back and mounted it to the front of my card base.
With the card foundation set, it was time to get into the real fun! Using different colors of green cardstock, as well as different pinks, I cut out a bunch of flowers and leaves from the Sealed Wildflower die set. By the way, the tiny flowers were cut from Pool cardstock and a yellow drop of Yellow Brick Road Nuvo drops were added to the centers.
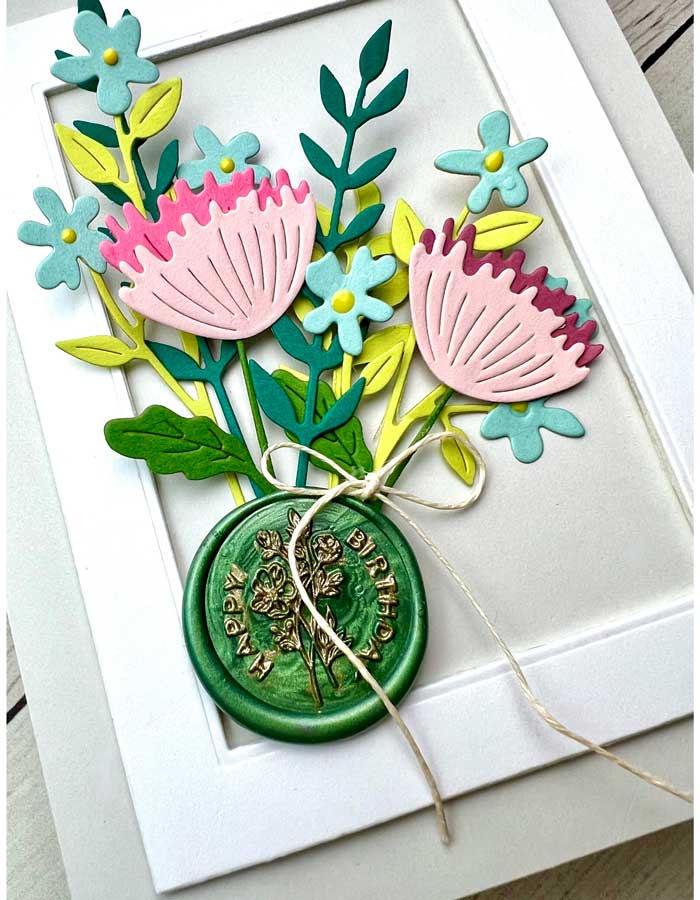
I did a quick assembly of the flowers and bunched them together to form a beautiful bouquet.
Before I mounted the bouquet of flowers, I made a wax seal using the new Spellbinders wax seals and wax. I have always loved wax seals so I was super excited to get to use these!
If you haven’t made a seal before, it is very easy. You just light a candle (I use a votive candle, but any will work), place 4 wax beads in your warmer spoon, and hold it over the flame until the wax is completely melted. Then, pour out the wax in a neat, round puddle, and add the seal on top. Wait until it is set (takes a dozen seconds or so), then remove the seal, and VIOLA… you have a beautiful seal to use.
Usually, I add a seal to the back of my envelopes to permanently seal the envelope, but in this case, I wanted to be able to remove the seal from the surface so I used the Waffle Flower mini media mat. It works like magic! You can pour the wax onto it and it will come off cleanly once set… this is awesome!
Now that the seal was done, I bunched up my flowers again, then added the seal on top to hold them in place. I used hot glue for adhering the seal but regular glue will work too, just use an ample amount and let it dry.
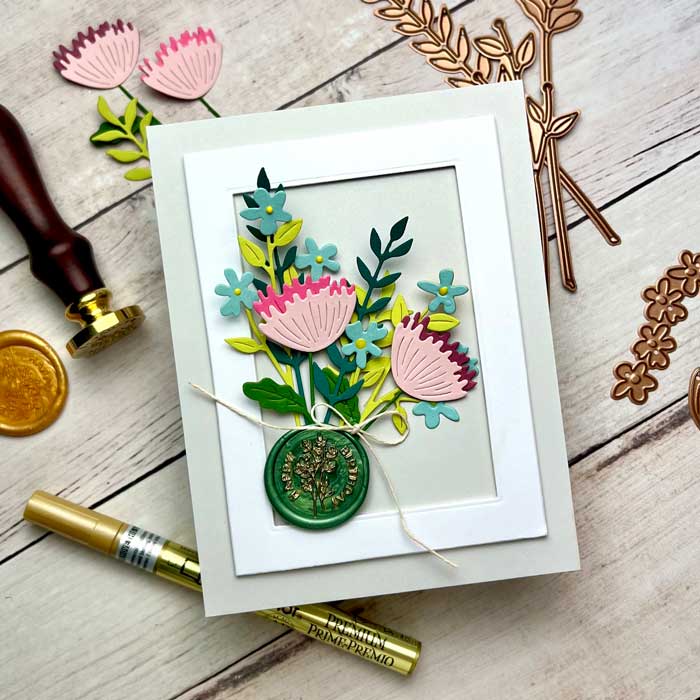
There was one more trick up my sleeve… I wanted the Happy Birthday to stand out on the seal. So, using the DecoColor Gold Metallic Marker, I lightly colored the top of the raised design and words to highlight the pattern and sentiment.
A tiny twine bow was added to complete the project! ♥
Goodies Used: