Hi Creative Friends,
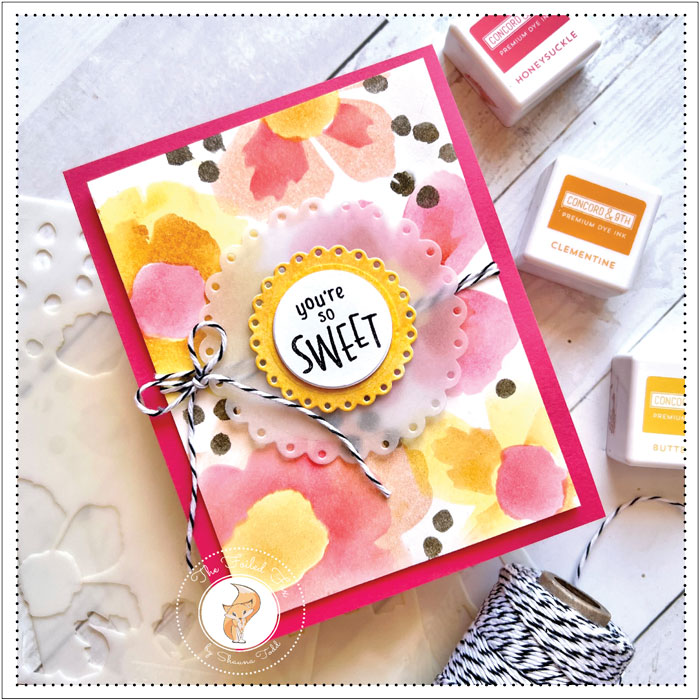
Concord & 9th has a new release – YAY! In it, there are a bunch of very sweet and summery stamps, dies, and stencils, ready to delight you. I have chosen the charming Cottage Garden for my project today.
I started with a piece of Bristol paper (for easy ink blending), a group of luscious Concord & 9th inks (see supply list below), a blending tool or brushes, and the Cottage Garden stencils.
The stencils are easy to use. I just started with the large blossom stencil and worked my way through, adding color to the interior of the flowers and then the centers with the use of the other stencils. I used two colors for each flower, plus the centers. It was super fast and easy to do!
When finished, I added strategic dots using one of the stencils and a Cobblestone ink cube by Concord & 9th. By the way, just a word about Concord & 9th’s inks. In short, their colors are gorgeous. They not only feature a beautiful color palette but they coordinate so well together too. Then, as an extra bonus, they offer cardstock to match! I am not one to get every ink out there, but these are keepers!
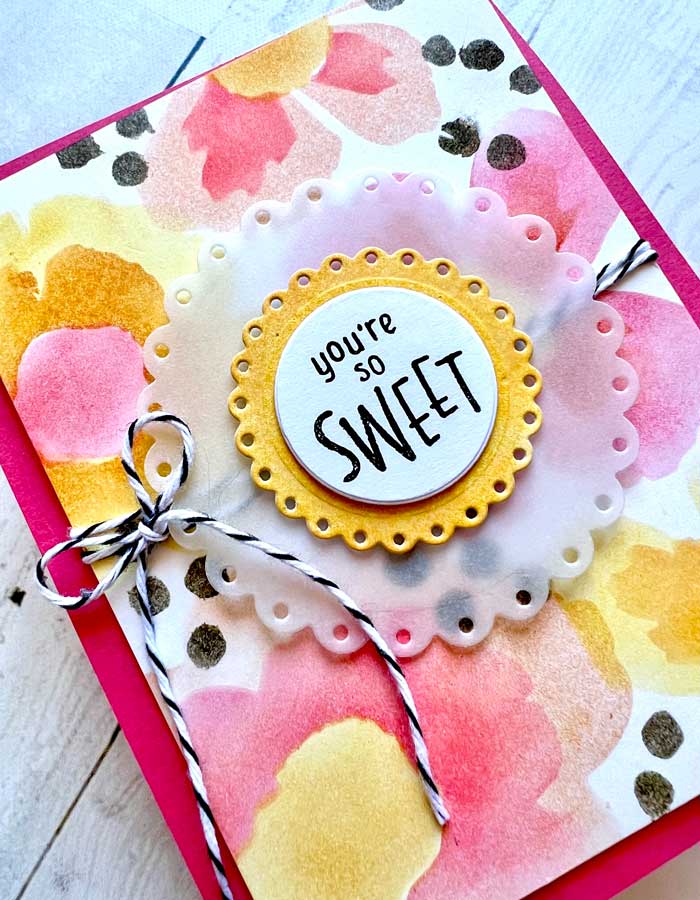
Back to making the card! With the floral panel done, I turned my attention to the other elements, mainly the scalloped circles. Using the Fancy Scalloped Circles by Lawn Fawn (see supply list), I cut a large vellum one and one other from Bristol paper. For this one, I swiped the Buttercup ink over the top, this way it matched perfectly with the floral panel!
Next, I cut a small circle from white cardstock, then stamped the ‘you’re so sweet’ sentiment onto it using Versafine Black Onyx ink.
To throw this whole card together, I made an A2-sized white card stock card base, then mounted a piece of pink cardstock on the front from the matching Concord & 9th cardstock pack.
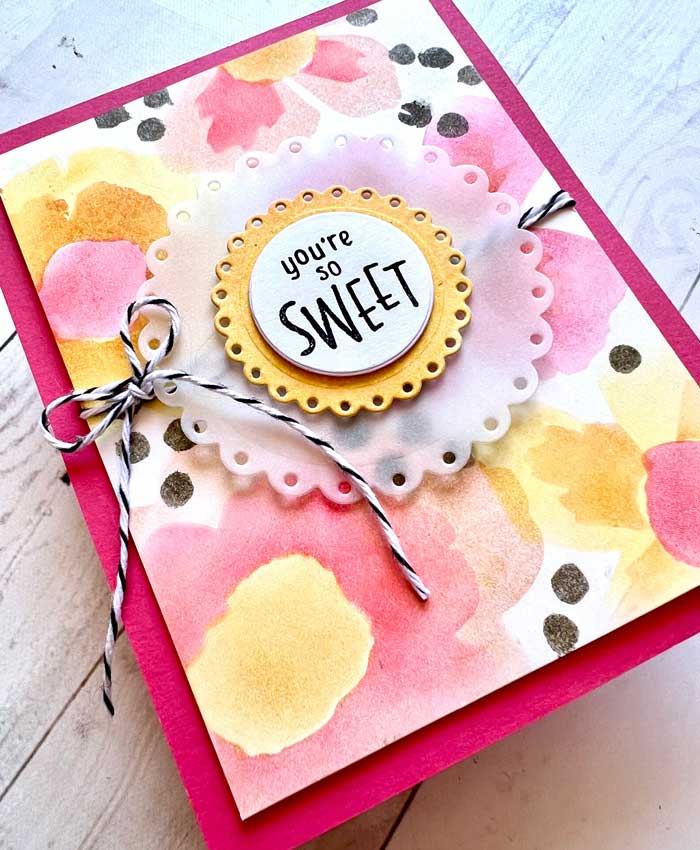
The floral panel was backed with foam, then I wrapped black and white twine around the middle and tied a bow. The vellum scalloped circle was placed on top using a few foam squares. Next, the Buttercup scalloped circle was stacked on top, then the sentiment circle was added. Each was separated by foam squares to give it a little extra dimension.
Believe or not, the card was finished! See how easy that was and I was very happy with the result! Hopefully, you liked it too! ♥
Goodies Used: