Hi Crafty Friends,
Every now and again I need a children’s birthday card, don’t you? Since I only had girls, I sometimes struggle to come up with the perfect card for a boy. But, Lawn Fawn came to my rescue. You can always count on them to have the perfect theme for any children’s card!
This one is for Rei, a sweet little 5-year-old boy, and was made using Lawn Fawn’s Charge Me Up stamp and die set and Oliver’s Stitched ABC’s.
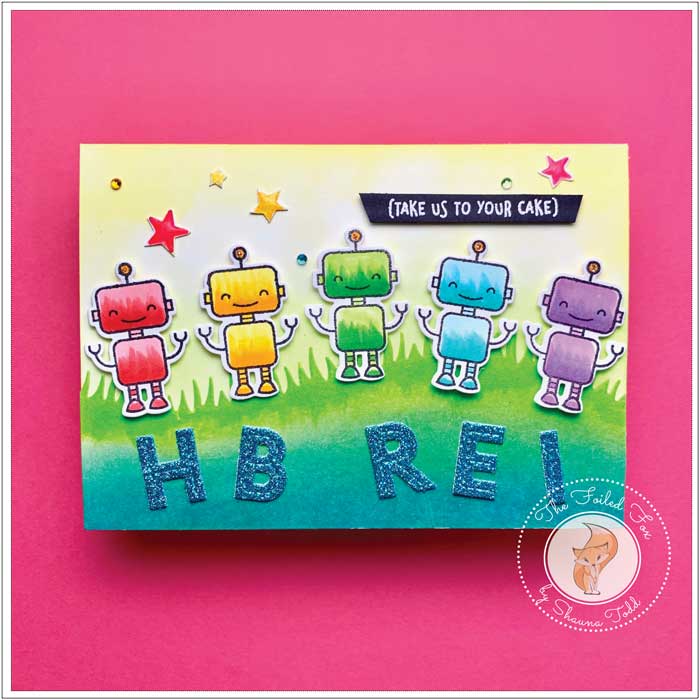
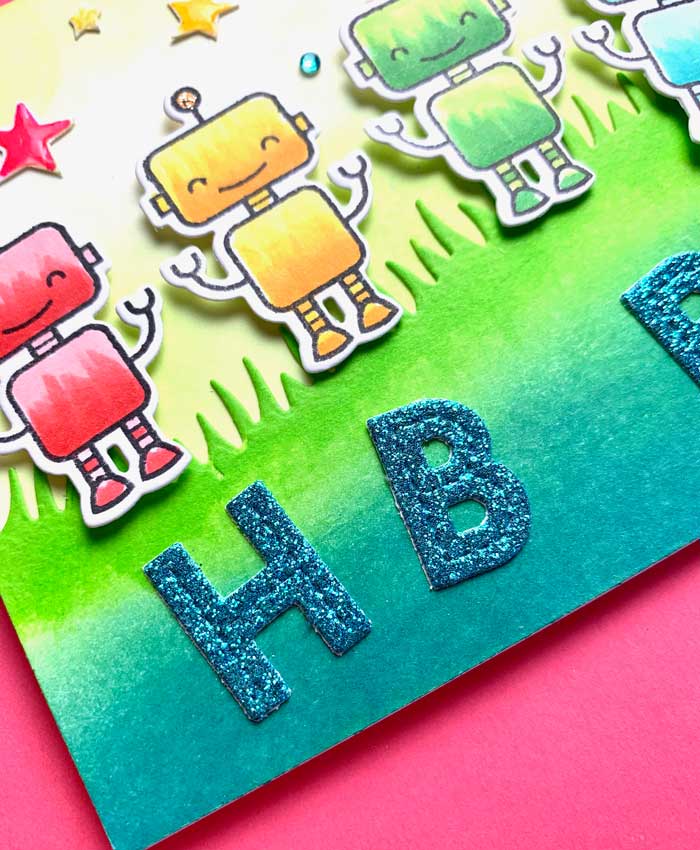
This card begins by cutting a grassy knoll out of Bristol paper (for easy ink blending) and coloring it first with Twisted Citron distress ink and then Broken China at the bottom. I wanted an intense ‘knoll’ so I actually took the pad right to the paper to get maximum saturation, then blended it out with an ink blending tool. The background panel was next. I colored it with a little Twisted Citron near the grass and Squeezed Lemonade at the top. With the background pieces done, I moved on to create the other elements.
Starting with the robots. I stamped and cut out 5 (for his five years) onto Neenah white card stock and colored them with Copic Markers. I used two complementary colors for each robot. The colors were: R20, R24, Y18, Y38, TG03, G07, Bg0000, BG15, V12, and V15.
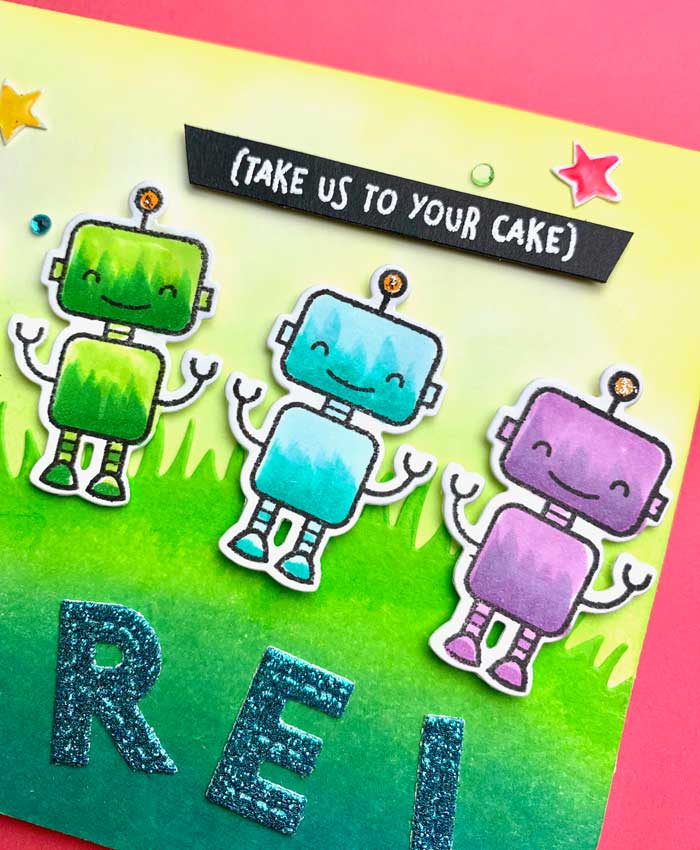
To spice things up, I cut out H -B – R – E – I from a piece of teal glitter paper using Oliver’s Stitched ABC’s die set. I figured these young kids have grown up learning all sorts of abbreviations to include in their texts, etc. that I could get away with abbreviating my birthday message (not to mention I got lucky with a short first name).
It was time to assemble. Using a white card base, I mounted the background, then the grassy knoll on top. Next, with a bit of foam tape on the back of each robot, I mounted them in rainbow fashion. Next, I adhered the glitter letters with some liquid glue.
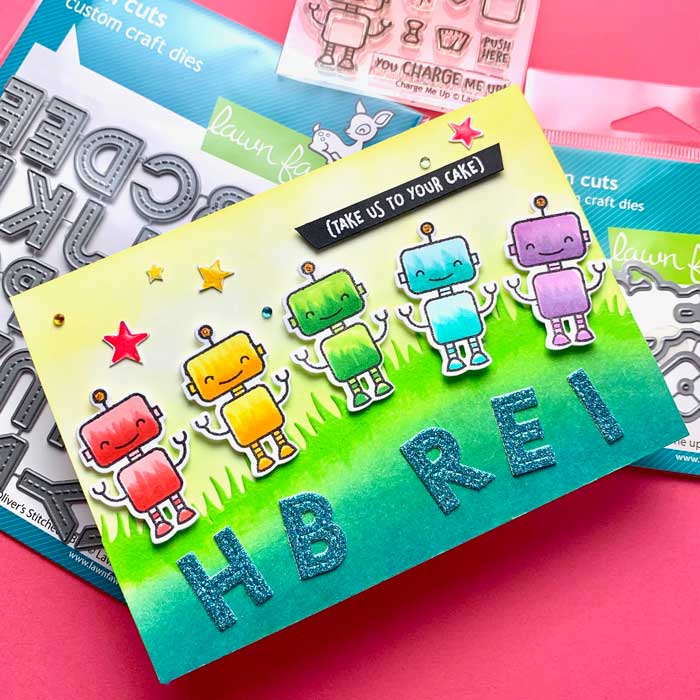
To have some fun, I stamped “Take Us To Your Cake” on black card stock with Versamark ink and white heat embossed it.
To finish the card, I added a few stars where I had squeezed on some Glossy Accents to give dimension, adhered the second sentiment, then added a few jewels.
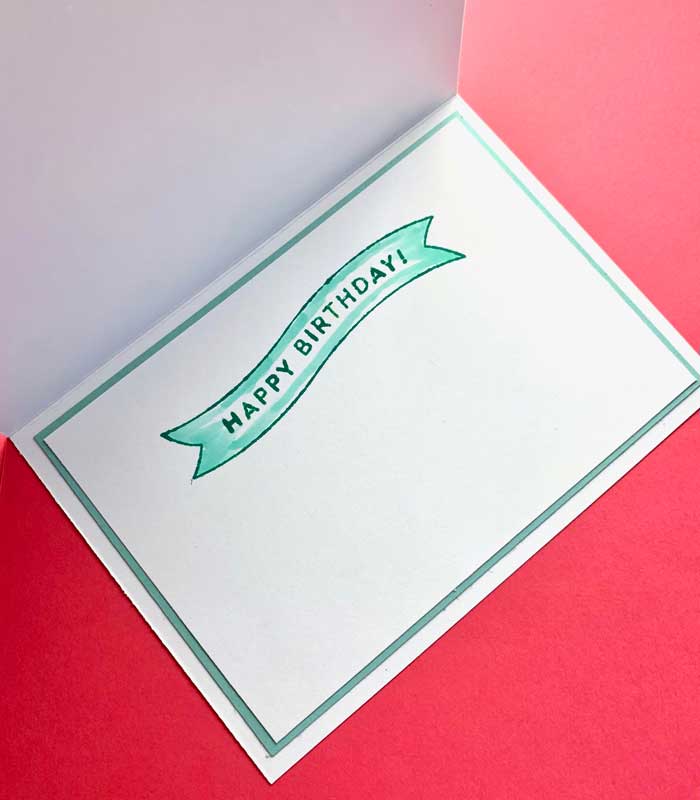
One last thing, inside the card I added a banner and Happy Birthday – now it’s ready to go. ♥
Goodies Used: